Thinking about adding a little something extra to your rooms, maybe a soft curve where the walls meet the ceiling? You know, that gentle line that just seems to make everything look a bit more put together? That, my friend, is cove moulding, and it brings a quiet elegance to any living area. It’s a decorative trim piece, typically with a concave shape, that fits into that ninety-degree corner where your wall and ceiling come together. This little detail can truly transform a space, making it feel finished and giving it a touch of classic charm without being too much, so it’s really rather nice.
People often choose this kind of trim because it offers a subtle visual transition, softening the sharp angles in a room. It’s not as bold as some other types of trim, which makes it a good pick for those who prefer a more understated look. Plus, it can actually hide minor imperfections where your walls and ceiling meet, which, you know, can happen in older homes or even new ones that are just a little bit off, so that’s a handy benefit.
Now, the thought of putting up trim might seem like a bit of a project, and in some respects, it is, but it’s definitely something you can do yourself. Just like when you are trying to get a certain program to install, and it just won’t seem to click, or perhaps an update keeps trying to install but then just… doesn't stick, you might feel a similar kind of challenge here. But with a bit of patience and the right steps, installing cove moulding can be a very rewarding task, giving your home a fresh, polished feel.
- People Got To Be Free Lyrics
- Meghan Housewives Of Orange County
- Tops To Wear With Palazzo
- Wardrobe Malfunction On Tv
- Whitney Houston Teeth
Table of Contents
- What is Cove Moulding, Anyway?
- Getting Ready for Installing Cove Moulding
- What Tools Do You Really Need for Installing Cove Moulding?
- How Do You Measure for Installing Cove Moulding?
- Making Those Cuts - A Key Step in Installing Cove Moulding
- Any Tricks for Getting Clean Cuts When Installing Cove Moulding?
- Attaching the Pieces - The Heart of Installing Cove Moulding
- Finishing Touches After Installing Cove Moulding
- What About Gaps and Imperfections When Installing Cove Moulding?
- A Few More Thoughts on Installing Cove Moulding
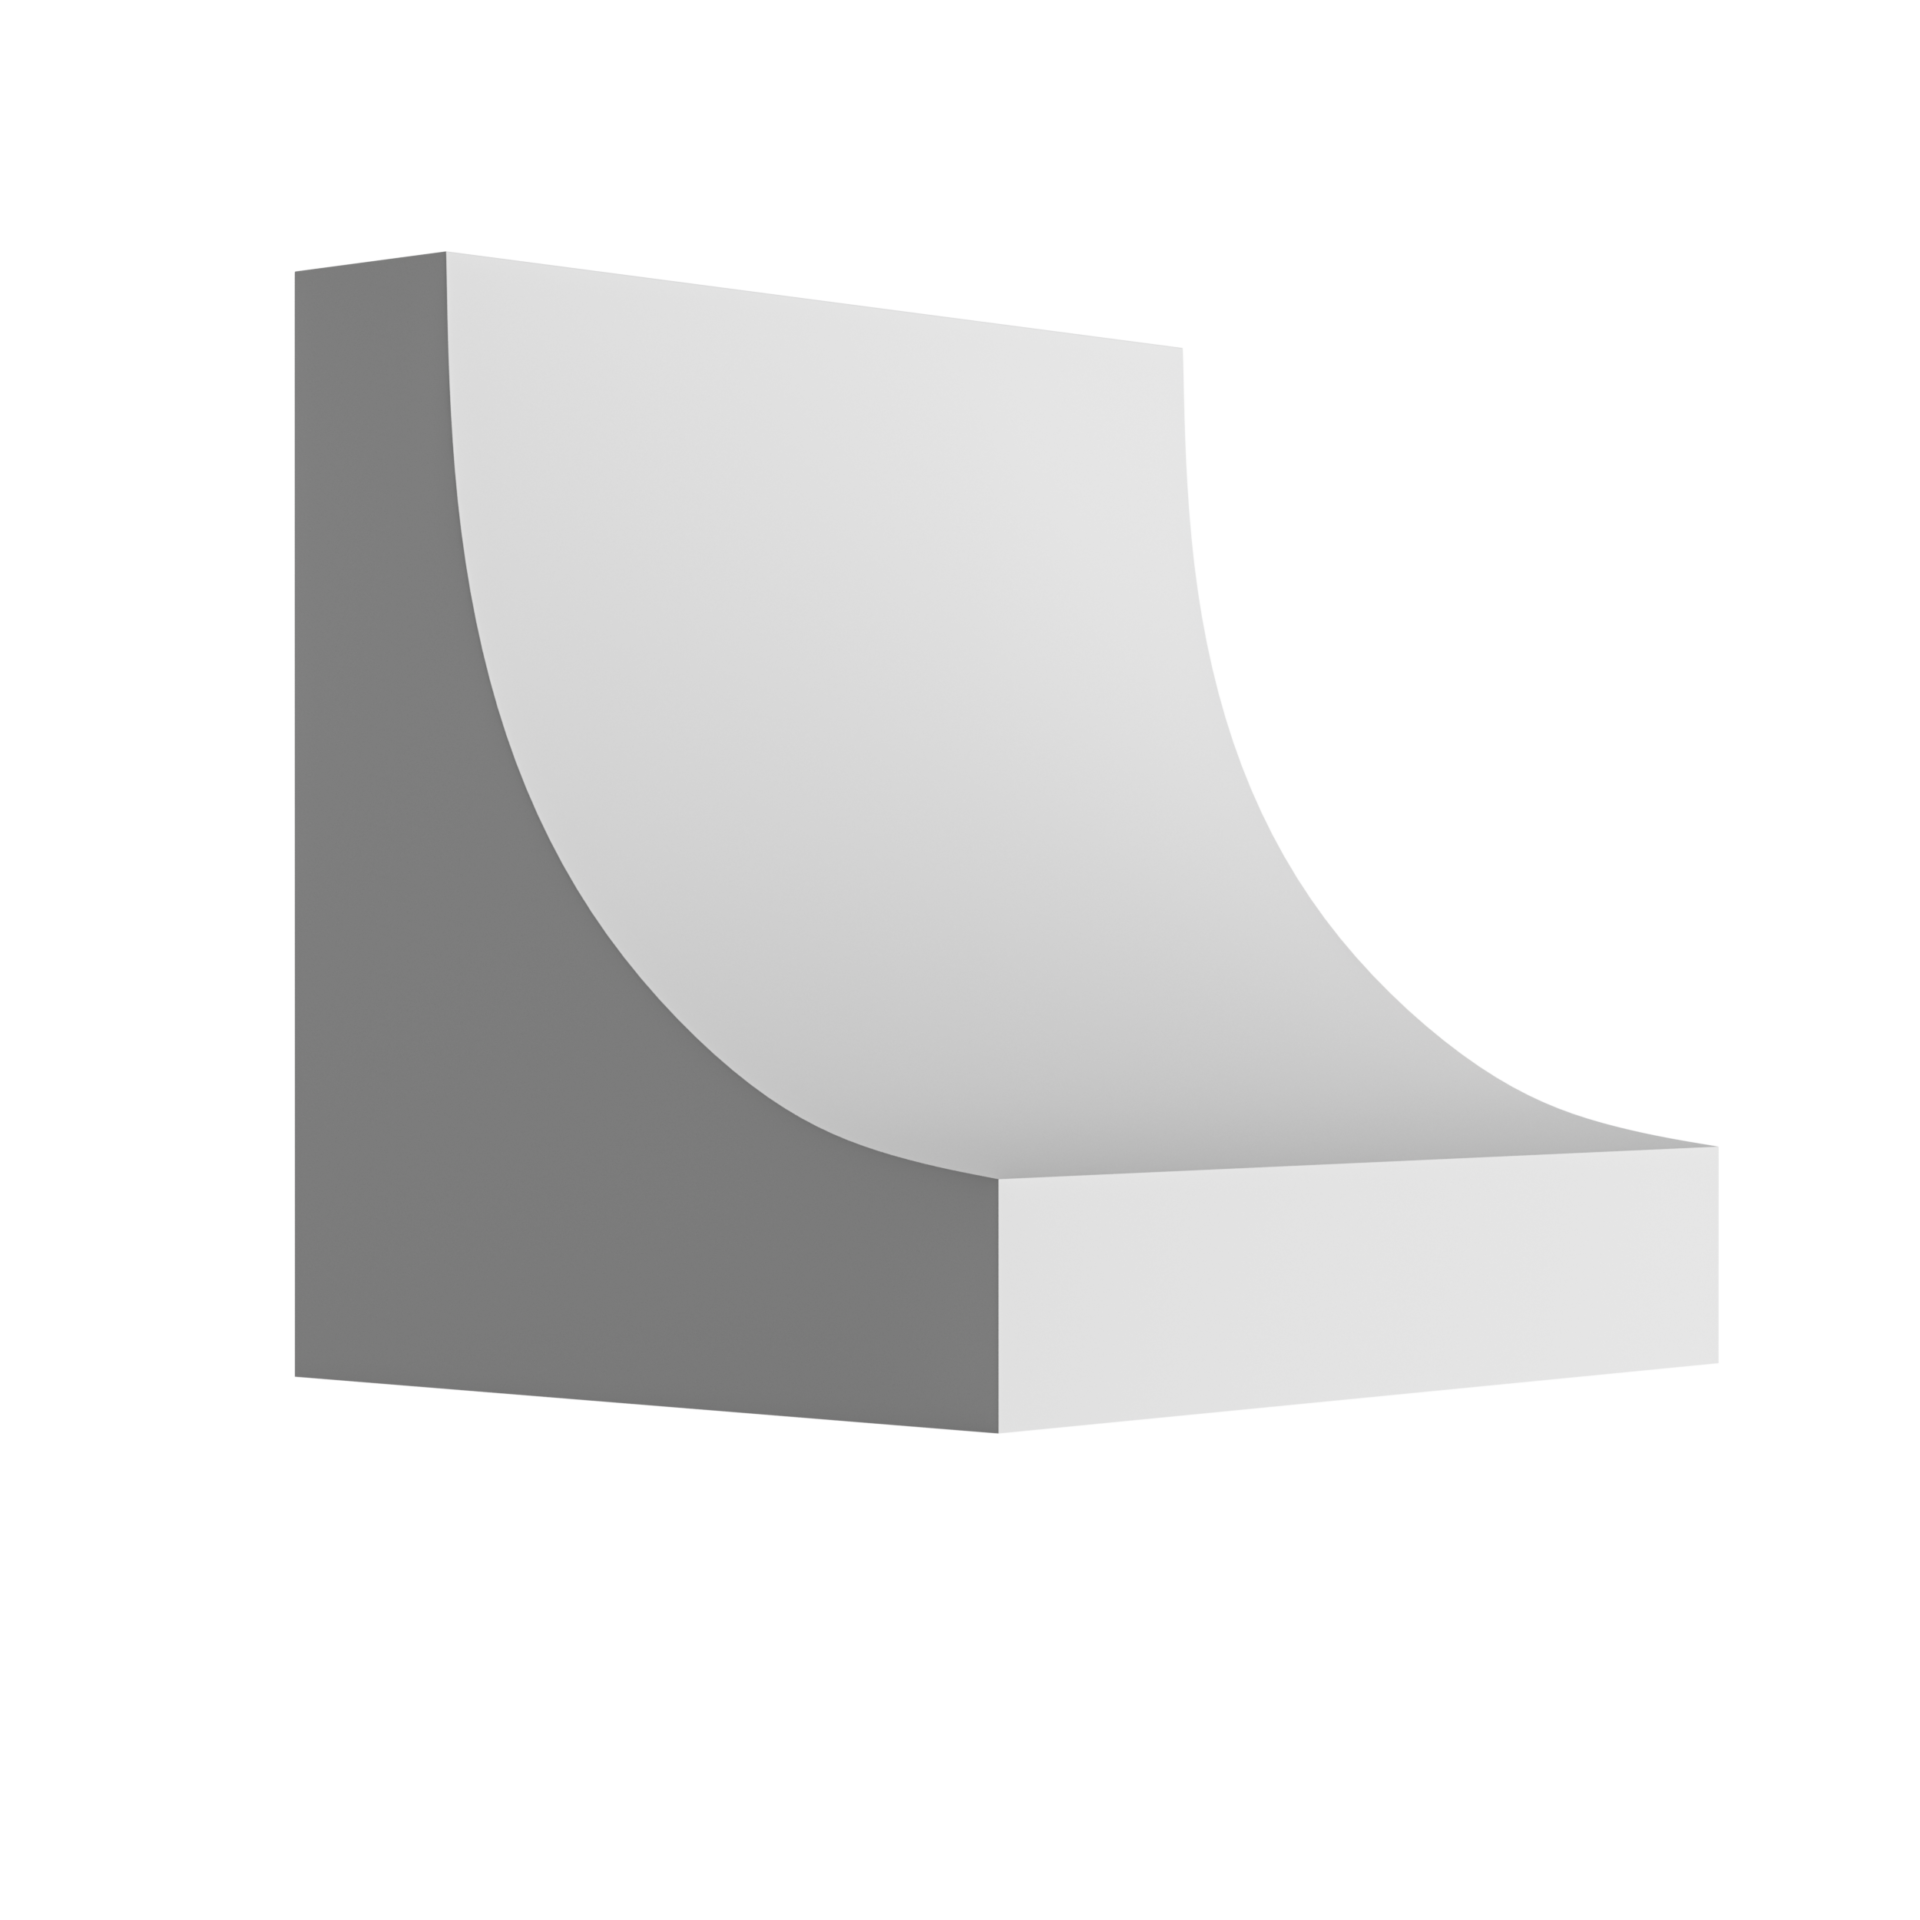
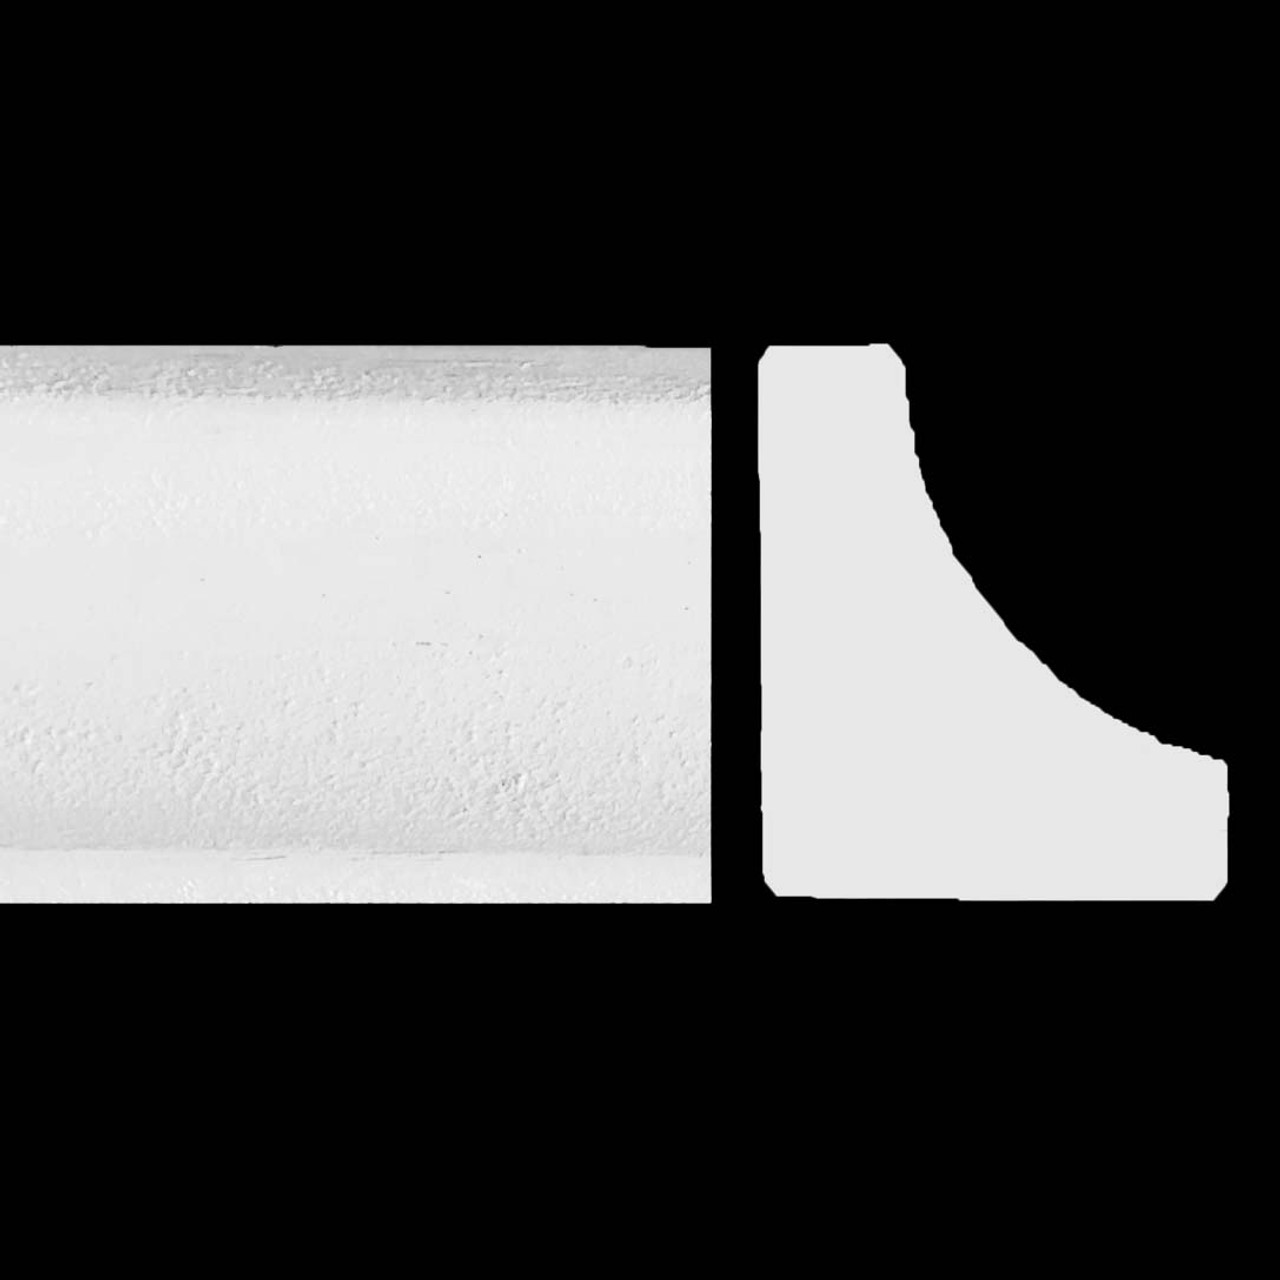
What is Cove Moulding, Anyway?
Cove moulding, in its simplest form, is a piece of trim that has a scooped-out profile. Think of it like a gentle curve, a bit like the inside of a spoon, that runs along the top edge of your walls where they meet the ceiling. It’s a different look from crown moulding, which often has more layers and a grander, more ornate appearance. Cove moulding is typically smaller and offers a softer, more subtle visual element. It’s used to create a smooth transition, hiding that hard, sharp corner and adding a touch of quiet refinement to a room. People pick it for all sorts of reasons, sometimes just to make a room feel a little more complete, or perhaps to give it a slightly older, more classic feel without going over the top, you know?
This kind of trim is usually made from wood, like pine or poplar, which you can then paint or stain to match your room’s decor. Sometimes, you’ll find it made from MDF, which is a wood composite material, or even from PVC for areas that might get a bit damp. The material you choose might depend on where you’re putting it and what kind of finish you want to achieve. For instance, a bathroom might benefit from something that handles moisture better, whereas a living room could have a lovely painted wood finish. It’s all about what works best for your particular situation, that is what you want.
Getting Ready for Installing Cove Moulding
Before you even think about cutting or attaching anything, a good bit of preparation makes all the difference. It’s a bit like when you’re trying to install a new driver, and you realize you need to check if your system is compatible first; skipping that part can lead to all sorts of headaches later on. First, you’ll want to make sure your walls and ceiling are clean and relatively smooth where the trim will go. Any bumps or loose bits could cause problems down the line, so take a moment to give the area a quick once-over. You might need to wipe away dust or spiderwebs, or even scrape off any old paint drips. This step might seem small, but it really helps ensure a good, solid connection for your new trim, and that's something you want.
- Megan Thee Stallion Super Bowl
- Has Leonardo Dicaprio Ever Been Married
- Stephanie Izard Weight Loss
- Wonka Sequel
- Julio Foolios Body
Next, gather all your materials. This means the actual cove moulding pieces, of course, but also things like wood glue, nails or screws, and any tools you’ll need for cutting and attaching. Having everything within easy reach means you won’t have to stop halfway through the project to go searching for something, which can be pretty frustrating, you know? It's like when you're in the middle of a big software update and suddenly you realize you forgot to plug in your laptop, and then the battery dies. Having everything ready to go just makes the whole process flow much more smoothly, which is what we are aiming for here, more or less.
What Tools Do You Really Need for Installing Cove Moulding?
For installing cove moulding, you don't need a massive workshop, but a few key items will make your life a whole lot simpler. You’ll definitely want a measuring tape, because getting your lengths just right is pretty important. A pencil is also a must for marking your cuts. When it comes to cutting the actual moulding, a miter saw is going to be your best friend. It allows you to make precise angled cuts, which are really necessary for those corners where pieces meet up. If you don't have one, a miter box and a hand saw can work, but it takes a bit more effort to get those clean, sharp angles. So, you know, a miter saw is usually the preferred choice for this kind of work, as a matter of fact.
Beyond cutting, you'll need something to attach the moulding to the wall. A nail gun, either pneumatic or electric, is super helpful here, as it drives nails quickly and securely. If you don’t have a nail gun, a hammer and some finish nails will do the trick, but you might need to pre-drill small pilot holes to prevent the wood from splitting, especially with softer materials. A stud finder is also a very good idea, as attaching your moulding to wall studs will give it a much stronger hold. You don't want your trim pulling away from the wall later on, which can happen if it's just attached to drywall. A little bit of wood glue can also provide extra sticking power, especially for those tricky spots, so it’s something to consider.
How Do You Measure for Installing Cove Moulding?
Measuring for installing cove moulding is a step where a little extra care pays off big time. Think of it like trying to figure out how much space you have on your computer for new applications; you want to be precise so you don't run out of room halfway through. You'll want to measure each wall section where the moulding will go. Don't just measure once; measure twice, maybe even three times, to be absolutely sure. Walls aren't always perfectly straight, and corners aren't always perfectly square, so taking measurements at different points along the wall can give you a better idea of the true length you need. It’s a good practice to measure from corner to corner, rather than just assuming a room is a perfect rectangle, because, well, rooms rarely are, you know?
When you're measuring for inside corners (where two walls meet to form an angle that points into the room), you'll measure right into the corner. For outside corners (where two walls meet to form an angle that points out, like around a chimney breast), you'll measure to the outside edge of that corner. It’s often a good idea to add a little extra length to your cut pieces, maybe an inch or two, just in case. You can always trim a piece shorter, but you can’t make it longer once it’s cut. This little bit of extra material can save you from having to go back to the store for another piece if your first cut isn’t quite right, which, you know, can happen, as a matter of fact.
Making Those Cuts - A Key Step in Installing Cove Moulding
Making the cuts for installing cove moulding is where many people feel a bit of apprehension. It’s a bit like when you’re trying to install a language pack, and you’re waiting to see if it’s going to take thirty minutes or if something’s gone wrong; there’s a moment of uncertainty. For inside corners, you’ll typically make two pieces meet with a 45-degree angle cut. One piece will have its angle cut one way, and the other piece will have its angle cut the opposite way, so they fit together snugly. This is called a miter joint. For outside corners, you’ll also use 45-degree angle cuts, but the angles will be oriented differently so the outside edges meet up cleanly. It takes a bit of practice to get the hang of positioning the moulding correctly on your saw, because the curved profile can make it sit a bit awkwardly, you know?
A good tip is to use scrap pieces of the moulding to practice your cuts first. This lets you get a feel for how the saw handles the material and how to set the angles correctly without wasting your good pieces. Label your pieces as you cut them – like "Wall A, Left Corner" or "Wall B, Right Corner" – so you don't get them mixed up. It’s very easy to cut a piece the wrong way if you’re not paying close attention, and then you’ve got to start over, which is never fun. Remember, the goal is for these pieces to fit together with as little gap as possible, so taking your time with each cut is really worth it, basically.
Any Tricks for Getting Clean Cuts When Installing Cove Moulding?
Getting truly clean cuts when installing cove moulding can make a huge difference in the final look. One helpful trick is to make sure your saw blade is sharp. A dull blade can tear the wood or leave rough edges, which then require more sanding and filling later on. Another tip is to cut slowly and steadily. Don't try to force the blade through the wood too quickly; let the saw do the work. This helps prevent splintering and ensures a smoother cut line. For very crisp edges, some people put a piece of painter's tape along the cut line on the moulding before cutting; this can help reduce tear-out, especially with softer woods or MDF, which is quite clever.
When you’re making your angled cuts, especially for inside corners, you might find that even with a perfect 45-degree cut, the pieces don't quite meet perfectly. This is often because the actual wall corner isn't exactly 90 degrees. A common trick here is to "cope" the joint. This means cutting one piece straight into the corner, and then using a coping saw to cut the profile of the first piece into the end of the second piece. This allows the second piece to fit snugly against the first, even if the corner isn't perfectly square. It's a bit more advanced, but it creates a really tight, professional-looking joint that hides those slight imperfections in your walls, so it's a good technique to learn for installing cove moulding, you know.
Attaching the Pieces - The Heart of Installing Cove Moulding
Once your pieces are cut, it’s time to put them up. This is where all that measuring and cutting really comes together. It’s a bit like when you've finally downloaded and installed OneNote, and you can actually see it working on your computer; there's a real sense of progress. Start with your longest pieces first, if possible, as they can help set the line for the shorter ones. Apply a thin bead of wood glue along the back edges of the moulding where it will meet the wall and ceiling. Don't go overboard with the glue; just enough to help it stick. Then, position the piece firmly in place. You want to make sure it’s snug against both the wall and the ceiling. If you have a helper, this part can be a bit easier, as one person can hold the piece while the other secures it.
Now, use your nail gun or hammer to attach the moulding. Aim your nails into the wall studs if you can, as this provides the most secure hold. If you can’t hit a stud, angle your nails slightly, one up into the ceiling joist (if applicable and safe) and one down into the wall, creating a stronger grip in the drywall. Space your nails every 16 to 24 inches, or closer if the moulding feels loose. At the corners, add a few extra nails to really hold those mitered or coped joints tight. You want these joints to stay closed and not pull apart over time. If you see any gaps, a little pressure or a well-placed nail can often close them up. It’s all about getting that firm, consistent attachment, which is really what makes the trim look good, basically.
Finishing Touches After Installing Cove Moulding
With all the pieces of your cove moulding attached, you're nearly there, but the finishing touches are what really make the project shine. This is where you address any small imperfections, much like when a Windows update seems to get stuck at 20% for a very long time, and you just have to wait it out and then deal with whatever comes next. First, you'll want to fill any nail holes with wood putty or spackle. Apply a small amount, smooth it over with a putty knife, and let it dry. Once dry, you might need to lightly sand the filled spots to make them perfectly flush with the moulding surface. This creates a smooth, uninterrupted look, which is what you're after.
Next, you’ll want to caulk any gaps where the moulding meets the wall or ceiling. Even with careful cuts and precise installation, tiny spaces can appear, especially in older homes where walls aren’t perfectly flat. A bead of paintable caulk along these seams will fill them in and create a seamless transition. Apply the caulk, then smooth it with a wet finger or a caulking tool for a clean line. This step really ties everything together and makes the moulding look like it’s a natural part of the room, rather than something that was just added on. It’s a very important step for a professional finish, you know.
What About Gaps and Imperfections When Installing Cove Moulding?
It's totally normal to have some small gaps or imperfections when installing cove moulding, even for experienced folks. Nobody's home is perfectly square, and wood can have its own little quirks. The key is knowing how to make those little flaws disappear. For small gaps at the joints or where the moulding meets the wall, a good quality paintable caulk is your best friend. Just apply a thin bead, then smooth it out with a damp finger or a specialized tool. This will fill the space and create a smooth, continuous line, basically. It's amazing how much a little caulk can do to make things look really neat, in a way.
For any dents, dings, or larger gaps in the wood itself, wood filler or spackle comes in handy. Apply it, let it dry, and then sand it smooth. Remember to clean up any dust before painting. If you’re painting the moulding, a good primer will help the paint stick evenly and give you a better final color. Two coats of paint are usually a good idea for a durable and even finish. Sometimes, you might find that a piece of moulding just doesn’t want to sit perfectly flush. In those cases, a tiny bit of extra adhesive or an additional nail might be needed to persuade it into place. It’s all about making small adjustments until it looks just right, which is something that tends to happen with these kinds of projects, you know.
A Few More Thoughts on Installing Cove Moulding
As you wrap up your project of installing cove moulding, remember that practice makes things easier. Your first room might take a bit longer, and you might learn a few things along the way, but each subsequent room will likely go more smoothly. It’s a bit like when you’re trying to install a specific set of office applications, and you realize you don’t have enough space for everything; you learn to be more selective and efficient with your resources the next time around. Don’t be afraid to take breaks if you feel frustrated. Sometimes stepping away for a bit and coming back with fresh eyes can help you solve a problem that seemed tricky before.
Also, consider the overall look you're going for. Cove moulding is a subtle touch, but it adds a lot of character. If you’re painting it, think about whether you want it to match the wall color, the ceiling color, or be a contrasting trim color. Each choice creates a different feel in the room. Some people like to paint it the same color as the ceiling to make the ceiling feel a little taller, while others prefer it to match the wall for a more integrated look. It’s really up to your personal taste and what kind of atmosphere you want to create in your home, so that’s something to think about.
Finally, take a moment to appreciate your work. Installing cove moulding is a tangible improvement to your living space, a visible sign of your effort and care. It’s a project that brings a quiet beauty and a finished look to any room, making it feel more complete and inviting. You’ve added a lovely detail that softens the lines and adds a touch of elegance, which is a pretty great accomplishment, you know?
- Meghan Housewives Of Orange County
- Kamala Harris You Are At The Wrong Rally
- Varis Death Scene
- Horror Hosts
- Old Lebrons